Curtain Pole Buying Guide: How to Choose, Measure & Install
From measuring up to fitting, here’s how to choose the best curtain pole or track for your window and fit it with confidence.
&poi={$this.metadata.pointOfInterest.x},{$this.metadata.pointOfInterest.y},{$this.metadata.pointOfInterest.w},{$this.metadata.pointOfInterest.h}&scaleFit={($this.metadata.pointOfInterest.x>0)?$sfpoi:$sfcenter}&sm=aspect&aspect=3:2&sfcenter=center&sfpoi=poi&qlt=50&fmt=auto&noiser=0&fmt.jpeg.interlaced=true&fmt.jp2.qlt=40&)
Date published: January 2026 | By Charlotte Pirie
Choosing curtain poles doesn’t need to be complicated. This detailed guide shows you how to measure your window, choose the best type of pole or track for your window, and understand key fittings like brackets, hooks and rings. We’ll also guide you on how to put up a curtain pole step-by-step with additional tips for choosing the best curtains to work with your choice of pole or track.
Quick guide to choosing and installing a curtain pole
- Pole vs track: Choose a pole for a decorative finish and flexibility in curtain headings. Choose a track for a discreet look or to curve around the alcove in bay windows.
- Pole length: Select a pole that is around 30cm longer than your window measurement so curtains stack back neatly when open.
- Pole height: Fit the pole around 12-15cm above your window to ensure curtain headings sit above the window.
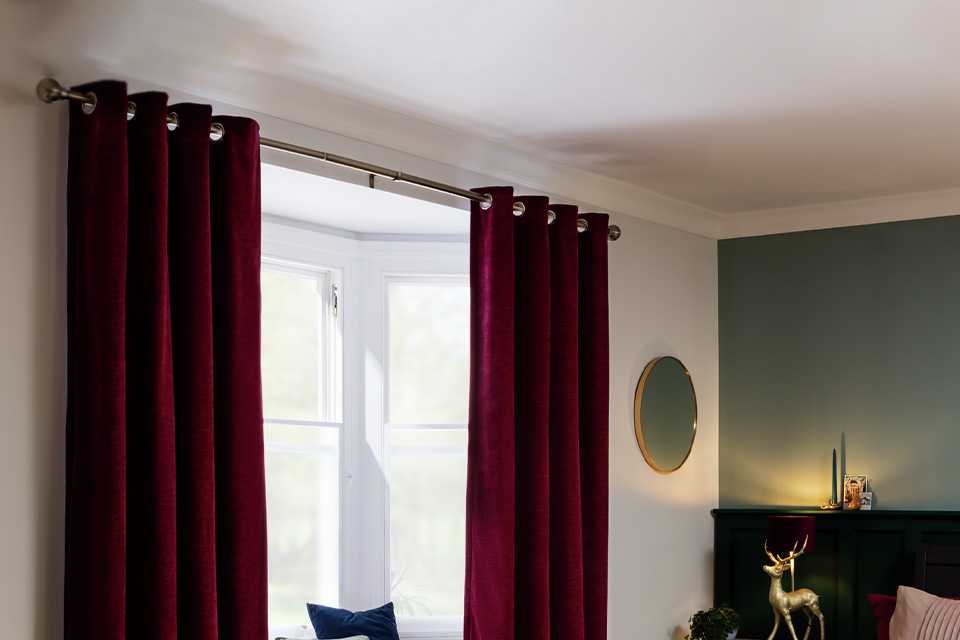
- Pole diameter: 19mm poles suit lighter weight curtains; 28mm poles suit heavier curtains and wider window spans.
- Brackets: Use 2 brackets for shorter windows. Add a centre bracket for longer poles or heavier curtains to add additional support.
Curtain poles & tracks
Slider Grid


Choosing the right curtain pole
Start with the type of look that you want, then match the pole type to your curtains and how you’ll use them day to day in your home.
Types of curtain poles (and when to choose them)
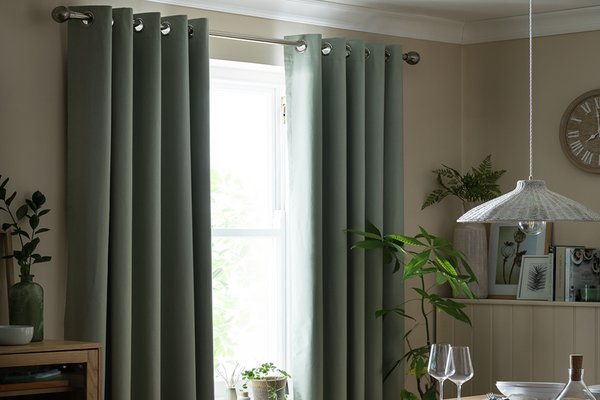
Standard wall-mounted poles: A popular choice with lots of style, material and colour choices. Standard poles work well for most windows and curtain types.
Extendable curtain poles: Great if your window is between sizes or you want future flexibility to use in a different window or property. These poles are ideal for quick updates and easy fitting.
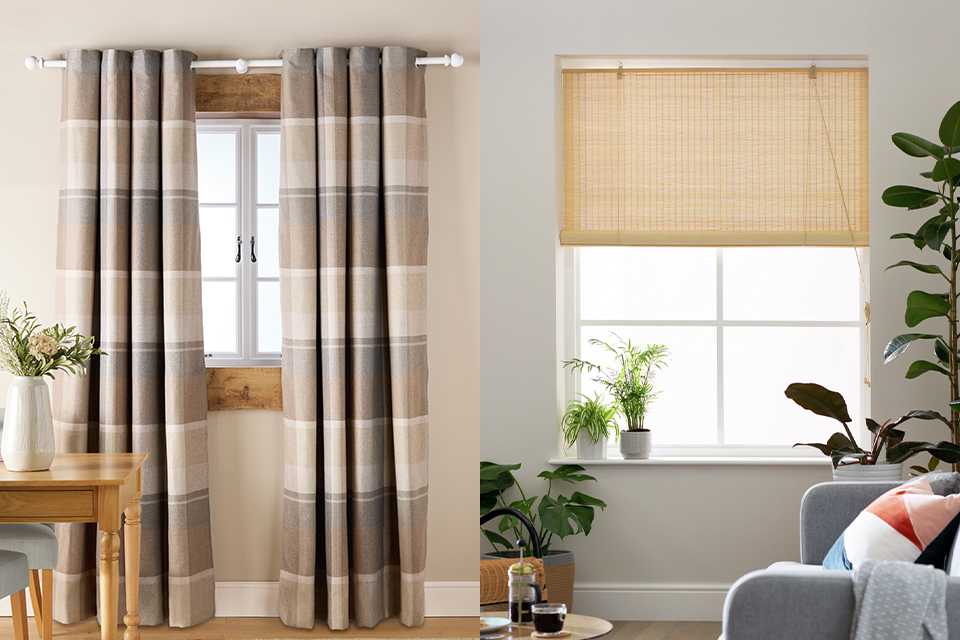
Bay window poles and tracks: Bay windows often need angled joints or flexible solutions. A plastic track is a good choice for a continuous run around bends/corners.
Ceiling-mounted poles/tracks: A less common choice but ideal for giving the illusion of more height in a room and for hanging floor to ceiling length curtains.
Corded operation: Handy for tall windows and hard-to-reach spots. A track with corded operation allows opening and closing using a cord instead of pulling the curtain fabric.
Match your pole to your curtain
• Eyelet curtains: Slide directly onto the pole. Look for a smooth finish and a diameter that fits comfortably through the eyelets. Shop: Eyelet curtains
• Pencil pleat curtains: Usually hang from curtain rings on a pole or gliders on a track making them a versatile choice. Shop: Pencil pleat curtains
Top Tip: If you open and close your curtains every day, investing in a high-quality pole with smooth operation and sturdy fittings can make a bigger difference than you think. It ensures durability, effortless movement, and a more enjoyable experience for years to come.
Curtain pole components
- Pole: the bar your curtains hang from
- Brackets: support the pole on the wall/ceiling
- Finials: decorative ends that also help keep rings in place
- Curtain rings: attach curtains to the pole (often via hooks)
- Holdbacks: keep curtains neatly to the side
- Draw rods: open/close without touching the fabric (useful for tall windows)
What size curtain pole do I need?
When measuring for a curtain pole ‘size’ usually means two things: pole length (how wide it is) and pole diameter (how thick it is). Getting both length and diameter right will ensure your curtains hang well, open smoothly and look neat and tidy.
How to measure for curtain poles

Curtain pole length - how long should a curtain pole be?
To measure for a pole or track fitting, first measure the width of the window recess. Your fitting should extend about 15-20cm each side to allow your curtains to fully block any light, so add a total of 30-40cm to your recess measurement.
Step-by-step:
- Measure the window width (edge to edge of the frame).
- Add 15–20cm on each side (that’s 30–40cm total) so curtains can stack back and let in more light.
- If you’re fitting a bay window, measure each section and consider a bay pole/track designed for corners.
Quick formula: Pole length = window width + 30–40cm
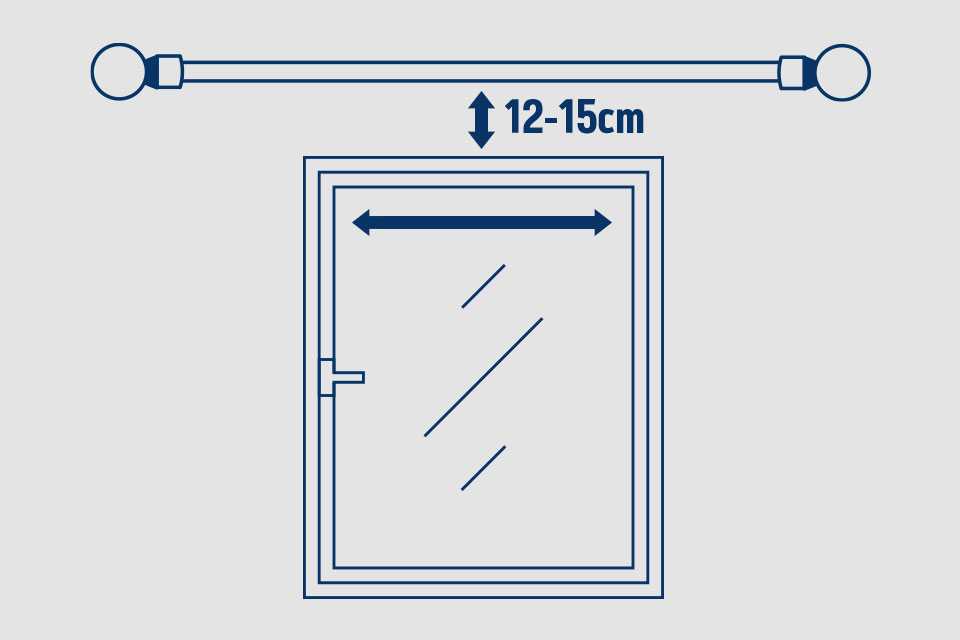
Curtain pole height - how high above the window?
A common guideline is fitting the pole above the window frame (often around 12–15cm, space allowing). Hanging higher can make the room feel taller—just ensure there’s still space for the curtain header and finials.
Curtain pole diameter (19mm vs 28mm)
Whilst visually subtle there is a difference between 19mm and 28mm poles. 28mm poles are usually sturdier for heavier curtains and wider spans, while 19mm poles are slimmer and better for lighter fabrics or smaller windows.
Choose 19mm if:
- You have lighter curtains
- Your window is smaller/standard width
- You want a more subtle look
Choose 28mm if:
- You have heavier curtains (lined/blackout/thermal)
- Your window is wide
- You want a bolder, more decorative finish
Curtains to match your new pole
Slider Grid


How to put up / install a curtain pole
Installing a curtain pole is a straightforward DIY job with the right tools and fixings. These steps suit most wall-mounted poles however your pole or track should also come with its own instructions.
Tools you’ll need for the job
- Tape measure
- Pencil
- Spirit level or laser level
- Step ladder
- Screwdriver
- Drill and drill bits
- Wall plugs and screws (these may come with your pole)
Before you start – safety first
To fit your pole or track you will need to drill into a wall, so it's best to check before you start that there are no pipes or cables nearby. If you're not sure where the pipes or cables lie, use a cable detector to check the area first.
- Shop cable detectors
Step-by-step: fitting a standard wall-mounted curtain pole
- Mark your height above the window, around 12–15cm above, space allowing.
- Mark end bracket positions, these will usually be around 10cm in from the end of the pole.
- If using a centre bracket mark this at the centre point of the window (remembering to leave 12-15cm above the window)
- Mark for any additional brackets required for your specific curtain pole/track.
- Check your markings are all level and parallel to the ceiling before drilling.
- Drill holes for your brackets at each marked point - your instructions will tell you the drill bit width required. Make sure you use the appropriate bit for the type of material you are drilling into.
- Add the wall plugs, supplied with most curtain pole/track kits (just check again they are the correct type for the material you are drilling into), and affix your brackets using a screwdriver.
Depending on the type of pole and curtain headings you are using you may need to hang the curtains on the pole before finalising the fixing e.g. Eyelet curtains.
- Position your pole or track to the brackets and follow the instructions to secure in place (you may need your screwdriver again for this).
- Attach finials if separate to the pole, although these can be added earlier if your specific instructions suggest this.
- Test opening and closing the curtains and step back to admire your work.
Installing wooden vs metal vs plastic poles
Here are our tips for extra considerations to make when installing your new curtain pole dependent on the material.
- Wooden poles: Often heavier so double check bracket strength and avoid overtightening to protect the finish.
- Metal poles: Great for smooth glide, ensure any joins are tight and won’t snag rings or eyelets as curtains are opened/closed.
- Plastic poles: Best for lighter curtains, use adequate bracket support to prevent bending over time.
Argos top tip for a neater finish
“Get your curtain pole brackets level from the start, curtains are excellent at highlighting even the tiniest mistake. What looks almost straight before hanging will not look straight once the curtains are on the pole. Take time to level your brackets properly and have the right tools for the job, even tiny wonky moments become very obvious once the curtains are up.”
Katie Gibson – Curtains Buyer at Argos
Curtain pole FAQs
How do I know what curtain pole to buy?
Start with your curtain heading (eyelet or pencil pleat), then choose a pole length (window width + 30–40cm). Pick a diameter based on curtain weight - 19mm for lighter curtains, 28mm for heavier or wider windows and then match the finish to your room.
Should a curtain pole be wider than a window?
Yes. Aim for 15–20cm wider on each side so curtains stack back neatly and let in more light.
What is the difference between 19mm and 28mm curtain poles?
28mm poles are usually sturdier for heavier curtains and wider spans, while 19mm poles are slimmer and better for lighter curtains or smaller windows.
Should your curtains be lighter or darker than your walls?
Both can work. Lighter curtains can make a room feel brighter and bigger; darker curtains add contrast and cosiness. Matching undertones (warm/cool) can help to bring everything together in a room.
What are the benefits of an extendable curtain pole?
Extendable curtain poles are perfect for any room as they can be made longer or shortened back to fit different window sizes. This makes them incredibly versatile as they can be modified as per your needs.
What size curtain pole do I need?
The length of your curtain pole should be the width of your window recess plus 30-40cm. This is to account for at least an additional 15cm on either side for coverage and to block any light.
How to clean a curtain pole?
Remember to first remove the curtain. Then use a soft cloth and dust your curtain rods. Do this at regular intervals to make sure that they are well maintained.
How to maintain a curtain pole?
- Wipe metal rods with a slightly damp cloth and mild soap in case of any tough marks or stains.
- Don't use wooden or non rust-resistant metal rails for bathrooms. These may get affected with damage or rust due to the humidity and water.
- Avoid using any harsh cleaners or materials to clean to prevent scratches.
Ready to update your windows?
Shop curtain poles, tracks and curtains to find the perfect fit for your space.